간단한 게임 및 기능들을 가진 다용도 앱 "SuldenLion's Versatile App" 제작과 그에 따른 내용을 주간 별로 정리해볼 예정.
지금까지 익힌 프로그래밍 기술과 툴들을 이용하여 만들어보는 1인 프로젝트.
앱 내 모든 내용들은 유튜브 영상이나 타 앱 소스로부터 영감을 얻었으며 하나부터 열까지 프리스타일로 제작.
코드 보관 및 회고 목적의 글로써 기억하고자 하는 내용만 적을 예정. (설명 생략)
저퀄리티 일수있음.
SuldenLion's Versatile App
1주차>
먼저 Figma 툴을 이용하여 대략적인 초기 구상을 디자인 해보다.
[메뉴화면]

메인 메뉴화면에서 특정 메뉴로 들어가는 컴포넌트들을 만들어 동작시킬 예정
각 컴포넌트들은 이미지 버튼으로 구성되며 각 메뉴에 맞는 이미지 삽입
[로그인 화면]
아래 두 이미지와 비슷한 형식으로 디자인.
xml 파일에서 layout 배치 및 버튼 디자인 바꾸기
구글 계정 사용한 로그인 기능 구현 (Firebase 이용하여 데이터 관리)
계정 만들기 기능 및 자체 DB 구축해 볼 예정(기약없음. 우선순위 ↓).
일단은 존재하는 계정에 대해서만 로그인 동작
[버전 세팅]
build.gradle (project)의 dependecies에 아래 내용추가
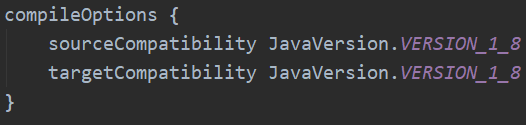
build.gradle (module) 의 버전 설정
dependencies에는
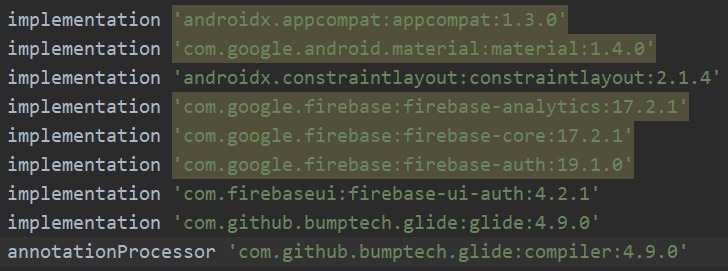
구글로그인 기능 등을 위한 모듈들을 implement
+

gradle-wrapper.properties의 distributionUrl 버전 6.9 사용

gradle. properties
어디선가 났던 오류 해결을 위해 사용 (false -> true)

[Firebase]
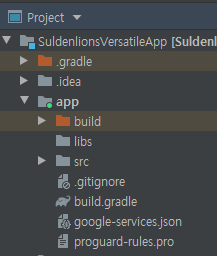
google-services.json 파일은

이걸 Project로 바꾼후 app 밑에.
[MainActivity.java]
package suldenlion.tistory.com;

import androidx.annotation.NonNull;
import androidx.annotation.Nullable;
import androidx.appcompat.app.AppCompatActivity;

import android.content.Intent;
import android.os.Bundle;
import android.text.Editable;
import android.util.Log;
import android.view.View;
import android.widget.Button;
import android.widget.EditText;
import android.widget.Toast;

import com.google.android.gms.auth.api.Auth;
import com.google.android.gms.auth.api.signin.GoogleSignInAccount;
import com.google.android.gms.auth.api.signin.GoogleSignInOptions;
import com.google.android.gms.auth.api.signin.GoogleSignInResult;
import com.google.android.gms.common.ConnectionResult;
import com.google.android.gms.common.SignInButton;
import com.google.android.gms.common.api.GoogleApiClient;
import com.google.android.gms.tasks.OnCompleteListener;
import com.google.android.gms.tasks.Task;
import com.google.firebase.auth.AuthCredential;
import com.google.firebase.auth.AuthResult;
import com.google.firebase.auth.FirebaseAuth;
import com.google.firebase.auth.GoogleAuthProvider;

public class MainActivity extends AppCompatActivity implements GoogleApiClient.OnConnectionFailedListener {

    private Button loginBtn;
    //private ImageView imageView;
    private SignInButton googleBtn;
    private FirebaseAuth auth;
    private GoogleApiClient googleApiClient;
    private static final int REQ_SIGN_GOOGLE = 100; // 구글 로그인 결과 코드
    private EditText textId, textPassword;

    @Override
    protected void onCreate(Bundle savedInstanceState) {
        super.onCreate(savedInstanceState);
        setContentView(R.layout.activity_main);

        textId = findViewById(R.id.text_id);
        textPassword = findViewById(R.id.text_password);

        loginBtn = findViewById(R.id.login_btn);
        loginBtn.setOnClickListener(new View.OnClickListener() {
            @Override
            public void onClick(View v) {
                if (validateAccount(textId.getText().toString(), textPassword.getText().toString())) {
                    Toast.makeText(MainActivity.this, "로그인 성공", Toast.LENGTH_SHORT).show();
                    Intent intent = new Intent(MainActivity.this, MenuActivity.class);
                    intent.putExtra("nickName", textId.getText().toString());
                    startActivity(intent);
                } else {
                    Toast.makeText(MainActivity.this, "로그인 실패", Toast.LENGTH_SHORT).show();
                }
            }
        });

        //imageView = (ImageView)findViewById(R.id.imageView);
        //imageView.setImageResource(R.drawable.suldenlion);

        GoogleSignInOptions googleSignInOptions = new GoogleSignInOptions.Builder(GoogleSignInOptions.DEFAULT_SIGN_IN)
                .requestIdToken(getString(R.string.default_web_client_id))
                .requestEmail()
                .build();

        googleApiClient = new GoogleApiClient.Builder(this)
                .enableAutoManage(this,this)
                .addApi(Auth.GOOGLE_SIGN_IN_API, googleSignInOptions)
                .build();

        auth = FirebaseAuth.getInstance();

        googleBtn = findViewById(R.id.btn_google);
        googleBtn.setOnClickListener(new View.OnClickListener() {
            @Override
            public void onClick(View v) {
                Intent intent = Auth.GoogleSignInApi.getSignInIntent(googleApiClient);
                startActivityForResult(intent, REQ_SIGN_GOOGLE);
            }
        });

    }

    private boolean validateAccount(String id, String pwd) { // 로컬 DB에서 아이디, 패스워드 체크 구현해볼 예정
        Log.v("id", "id = " + id);
        Log.v("pwd", "pwd = " + pwd);
        if (id.equals("admin") && pwd.equals("1234")) {
            return true;
        }

        return false;
    }

    @Override // 구글 로그인 인증 요청 후 결과 값 되돌려받는 곳
    protected void onActivityResult(int requestCode, int resultCode, @Nullable Intent data) {
        super.onActivityResult(requestCode, resultCode, data);

        if (requestCode == REQ_SIGN_GOOGLE) {
            GoogleSignInResult result = Auth.GoogleSignInApi.getSignInResultFromIntent(data);
            if (result.isSuccess()) {
                GoogleSignInAccount account = result.getSignInAccount(); // 구글 로그인 정보담은 객체 (닉네임, 프로필사진 등)
                resultLogin(account);
            }
        }
    }

    private void resultLogin(GoogleSignInAccount account) {
        AuthCredential credential = GoogleAuthProvider.getCredential(account.getIdToken(), null);
        auth.signInWithCredential(credential)
                .addOnCompleteListener(this, new OnCompleteListener<AuthResult>() {
                    @Override
                    public void onComplete(@NonNull Task<AuthResult> task) {
                        if (task.isSuccessful()) {
                            Toast.makeText(MainActivity.this, "로그인 성공", Toast.LENGTH_SHORT).show();
                            Intent intent = new Intent(getApplicationContext(), MenuActivity.class);
                            intent.putExtra("nickName", account.getDisplayName());
                            intent.putExtra("photoUrl", String.valueOf(account.getPhotoUrl()));

                            startActivity(intent);
                        } else {
                            Toast.makeText(MainActivity.this, "로그인 실패", Toast.LENGTH_SHORT).show();
                        }
                    }
                });
    }

    @Override
    public void onConnectionFailed(@NonNull ConnectionResult connectionResult) {

    }
}
logcat 콘솔에 값 찍어보는 것은 Log.v() 사용
[activity_main.xml]
<?xml version="1.0" encoding="utf-8"?>
<LinearLayout xmlns:android="http://schemas.android.com/apk/res/android"
    xmlns:app="http://schemas.android.com/apk/res-auto"
    xmlns:tools="http://schemas.android.com/tools"
    android:layout_width="match_parent"
    android:layout_height="match_parent"
    android:orientation="vertical"
    tools:context=".MainActivity">

    <TextView
        android:layout_marginTop="50dp"
        android:layout_gravity="center_horizontal"
        android:layout_width="wrap_content"
        android:layout_height="wrap_content"
        android:text="LOGIN"
        android:textSize="50dp"
        android:textColor="#DFAA0C"
        android:textStyle="bold" />

    <TextView
        android:layout_marginTop="50dp"
        android:layout_width="match_parent"
        android:layout_height="wrap_content"
        android:text="ID" />

    <EditText
        android:id="@+id/text_id"
        android:layout_width="match_parent"
        android:layout_height="wrap_content"
        android:ems="10"
        android:inputType="textPersonName" />

    <TextView
        android:layout_marginTop="30dp"
        android:layout_width="match_parent"
        android:layout_height="wrap_content"
        android:text="Password" />

    <EditText
        android:id="@+id/text_password"
        android:layout_width="match_parent"
        android:layout_height="wrap_content"
        android:ems="10"
        android:inputType="textPassword" />


    <Button
        android:layout_marginTop="100dp"
        android:id="@+id/login_btn"
        android:layout_width="match_parent"
        android:layout_height="60dp"
        android:text="Log in"
        android:textAllCaps="false"
        android:textColor="#fff"
        android:textSize="20dp"
        android:background="@drawable/rounded_corner" />

    <TextView
        android:layout_marginTop="10dp"
        android:layout_marginBottom="10dp"
        android:layout_gravity="center_horizontal"
        android:layout_width="wrap_content"
        android:layout_height="wrap_content"
        android:text="OR"
        android:textSize="20dp" />

    <com.google.android.gms.common.SignInButton
        android:id="@+id/btn_google"
        android:layout_gravity="center_horizontal"
        android:layout_width="200dp"
        android:layout_height="wrap_content" />

</LinearLayout>
Layout 다중 사용 지양? - 메모리 많이 사용하므로?
소스코드 앞으로 블로그에는 통쨰로 올리지 않고 기억해야할 요소만 올리는게 나을듯
전체 코드는 깃에 올릴 예정

= 버튼 커스텀화
rounded_corner.xml 파일을 drawable 밑에 위치시킴.
[rounded_corner.xml]
<?xml version="1.0" encoding="UTF-8"?>
<shape xmlns:android="http://schemas.android.com/apk/res/android">

    <gradient
        android:type="linear"
        android:angle="45"
        android:startColor="#A3FDD7"
        android:endColor="#0567C1" />

    <!--    <solid android:color="#ffffffff"/>

    <stroke android:width="3dp"
        android:color="#ff000000" />

    <padding android:left="1dp"
        android:top="1dp"
        android:right="1dp"
        android:bottom="1dp" /> -->

    <corners android:radius="30dp" />
</shape>
gradient 속성으로 버튼 색 그라데이션 효과
[실행화면]
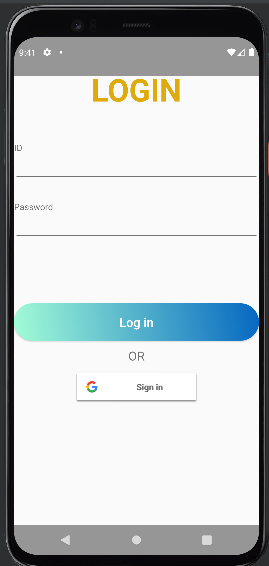
에뮬레이터 상 구글 로그인기능 잘 작동함.
디자인 손봐야 할듯 (중요x)
[values밑의 themes]
커스텀 적용 안되는 문제 아래와 같이 명시함으로써 해결

또한 NoActionBar 로 수정 (상단 bar 숨기기)
미리 지정해둔 로그인 계정 admin으로 로그인 시 다음의 메뉴 화면 등장
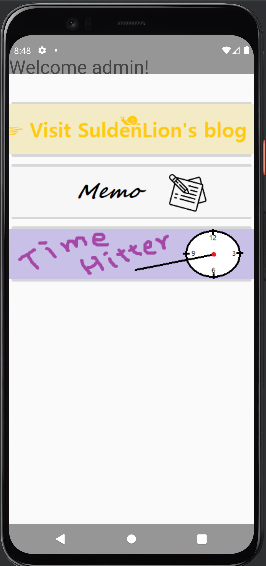
이미지 버튼 리스트 형식으로 각각의 기능을 한다.

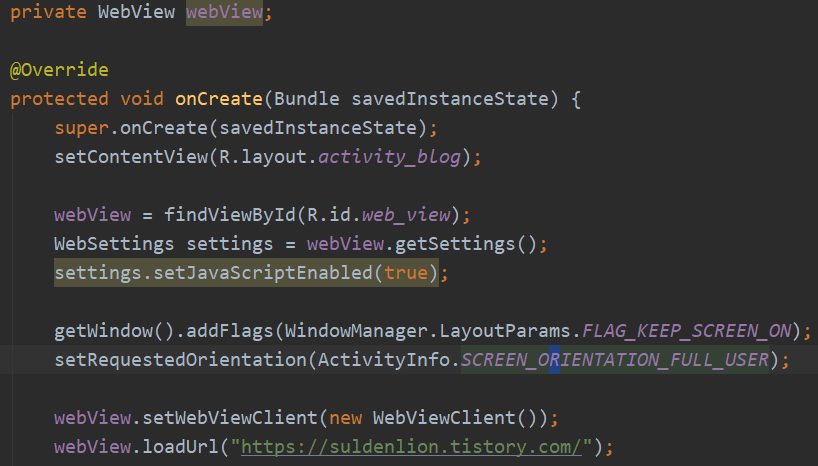
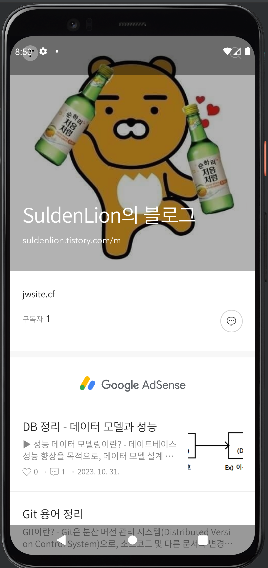
첫 번째 버튼 Visit SuldenLion's blog는 간단한 Web View 요소를 사용하여 제작자의 블로그에 방문할 수 있게하였다.
두번째 Memo 기능은 메모 내용을 저장, 수정, 불러오기, 삭제를 수행할 수 있는 프로그램이다.
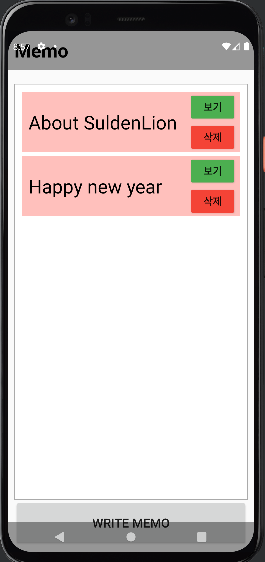
메모 프로그램 실행시 다음과 같이 메모 내용에 대한 리스트가 표시된다.
보기 버튼 클릭시 세부 내용 조회
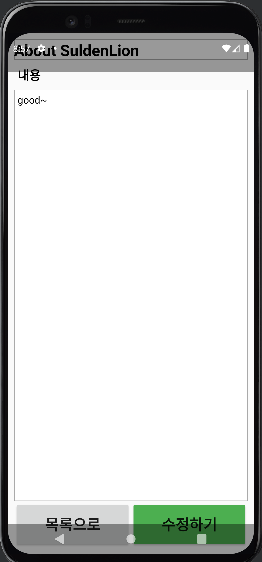
조회된 화면에서 수정하기 버튼을 누르면 내용을 수정할 수 있다.
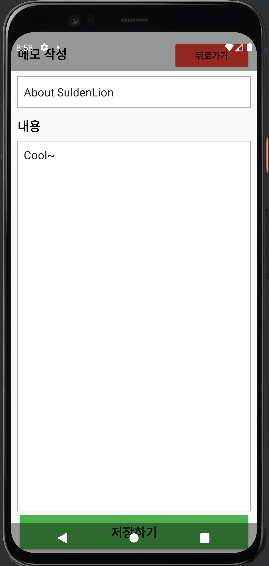
현재 이 프로그램은 DB를 사용하지 않으므로 메모 내용이 휘발적임.
Realm 이라는 DB를 사용할 수 있는 듯함. 더 찾아보고 추가 예정
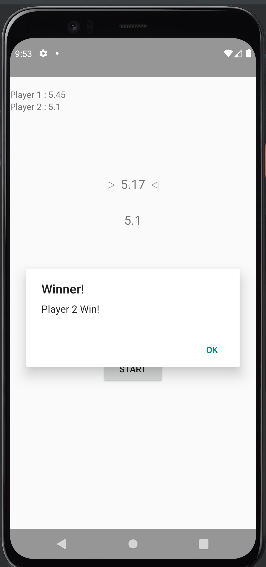
다음으로 Time Hitter.
2인용 게임으로써 상단에 시간이 제시되고 그 시간에 근접하게 버튼을 누른 사람이 승리하는 게임.

시작시 소개하는 다이얼로그를 띄워줌
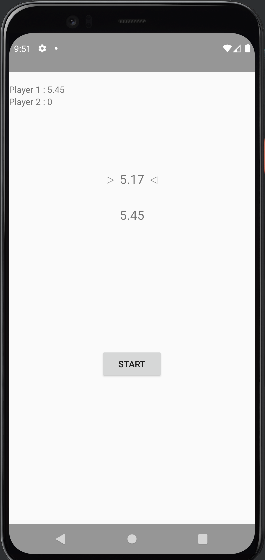
Player 1, 2의 점수가 좌측 상단에 기록되며, 결과에 따라 승자가 표시됨.
'App 소개' 카테고리의 다른 글
| 심심해서 만들어보는 앱 "SuldenLion's Versatile App" 개발로그_3 (0) | 2024.01.14 |
|---|---|
| 심심해서 만들어보는 앱 "SuldenLion's Versatile App" 개발로그_2 (0) | 2024.01.07 |
| SuldenLion Chatting (0) | 2022.05.16 |
| Legend Control (0) | 2022.05.16 |
| 전설의 두더지(Legend Mole) (0) | 2022.04.25 |


댓글